Sunday: Christmas dinner with Mr. Gooch's family
Monday: FITF (Forage in the Fridge)
Tuesday: Out for dinner (we have a showing for the house)
Wednesday: Chicken Kiev with PW's Crashed Potatoes, Carrots and a Salad
Thursday: Pork Tenderloin in the crockpot with Corn, Salad and Cheesy Skillet Potatoes
Friday: Chicken Quesedillas with Spanish Rice and a Salad
Saturday: Out for dinner (using one of our gift cards)
Check out orgjunkie.com to see what others are planning for their menus this week.
Monday, December 29, 2008
Menu Plan Monday
Tuesday, December 23, 2008
TWD: Real Buttersctoch Pudding
 The recipe for this week is Real Butterscotch Pudding (found on page 386 of Baking: From My Home to Yours) was selected by Donna of Spatulas, Corkscrews & Suitcases. Mr. Gooch was very excited to have me make this recipe. You see, friends of our had come to visit and had left behind some single malt scotch so we had all the ingredients on hand.
All the ingredients came together well, but it did make a mess. Apparently my food processor was not large enough and liquid leaked out. I also thought that the back and forth with the food processor that was a bit of a pain, mainly due to it leaking after every switcharoo. (Sidenote: I can't wait until Santa brings me an immersion blender for Christmas.) It smelled good simmering in the pan and had a great color making you think of butterscotch or caramel.
However, the recipe was a half fail. I say half because the pudding didn't set...AT ALL. It was just a thick cream consistency. However, it tasted amazing. So we ended up using the half-fail cream like a sauce over french vanilla ice cream. (Thus the photo at the top of this post.) It was very yummy. The perfect way to end a meal.
Monday, December 22, 2008
Tex-Mex Baked Chicken
 I saw this recipe on foodnetwork.com and knew there had to be a way that I could make this work without the frying.
So I checked out our pantry and put together the recipe below. It was a bit "hot" but the rice we served it with, helped even that out.
We will definitely be making this one again. (Please note: This dish is much tastier than the photo makes it out to be.)
Tex-Mex Baked Chicken
Adapted from Tex-Mex Chicken Crunchies
Ingredients
3/4 cup mixture bread crumb and Panko
1/2 cup Chipotle sauce
1/4 cup Taco Sauce
2 large skinned and boned chicken breast halves, cut into 1 inch wide strips
1/cup cheddar cheese
Directions
Preheat oven to 375 degrees.
Whisk together taco sauce and Chipotle sauce in a small bowl.
Stir together bread crumbs and Panko in a separate shallow dish.
Dredge chicken pieces in sauce mixture and dredge in crumb mixture.
Place covered chicken pieces in baking dish.
Drizzle with remaining sauce.
Mix cheese and breadcrumbs and cover chicken.
Cover the dish with aluminum foil and place in oven.
Bake for 20 minutes or until chicken is cooked completely.
Homemade Corn Bread
 My husband loves corn bread. He has been asking for me to make some for quite some time now and I will admit, I have been putting it off since I am not a fan.
But yesterday, I broke down. I found the recipe below on bigoven.com. I liked that it didn't require a box of cornbread mix (which we didn't have in the pantry).
Mr. Gooch was thrilled with the result. He said that it was moist and tasty. That is good enough for me to recommend it.
Grandma's Creamed Corn Bread
Source: www.bigoven.com
Ingredients
4 tb Unsalted butter; melted
1/2 ts Salt
1 c Yellow cornmeal; preferably
1 cn (8 oz) creamed corn
3/4 c All-purpose flour
1 c Milk
2 tb Sugar
1 lg Egg; well beaten
1 tb Plus 1 tsp baking powder
Directions
Preheat the oven to 450 F.
Pour 2 tablespoons melted butter into 9-inch cake pan; bake for 5 minutes, until pan is very hot.
Meanwhile, in a medium bowl, whisk together the cornmeal, flour, sugar, baking powder and salt.
Make a well in the center and pour the creamed corn, milk, remaining 2 tablespoons butter and egg into the well.
Stir until smooth.
Pour the batter into the hot pan.
Bake until corn bread is golden brown and a toothpick inserted in the center comes out clean, 30 to 35 minutes.
Remove corn bread from oven, and let it stand for 15 minutes before serving.
Makes 6 to 8 servings.
Sunday, December 21, 2008
Mexican Taco Shells
 Why is it that the most tasty meals photography so unattractively? I suppose it is just one of those mysteries of the world. This is one of those situations. The dish doesn't photograph well, but it is so good.
After seeing the recipe for this dish on Get in My Belly, I knew Mr. Gooch and I would need to have it for dinner. We both love Mexican spices, pasta and cheese. This dish combines all three so how could we go wrong?
It was as good as we thought it would be. This is definitely going to be added to the dinner rotation.
Mexican Taco Shells
Source: Get in My Belly
Ingredients
1 lb. ground beef
1 package taco seasoning
4 oz. cream cheese (we used low-fat)
12 jumbo pasta shells (we used a lot so we could fill the whole pan)
1 cup salsa
1 cup taco sauce
1 cup cheddar cheese
1 cup Monterrey jack cheese (We used mozzarella cheese)
1 1/2 cups crushed tortilla chips
3 green onions (omitted because I didn't have any)
Sour cream
Directions
1. In a frying pan cook ground beef; add taco seasoning and prepare according to package directions.
2. Add cream cheese, cover and simmer until cheese is melted. Blend well. Set aside and cool completely.
3. While ground beef is cooking, cook the pasta shells according to directions; drain. Set shells out individually on cutting board/baking sheet so that they don't stick together.
4. Pour salsa on bottom of 9x13 baking dish.
5. Stuff each shell with the meat mixture. Place shells in 9x13 pan open side up. Cover shells with taco sauce.
6. Cover with foil and bake for 30 minutes at 350 degrees.
7. After 30 minutes, add shredded cheese and bake for 10-15 more minutes.
8. Add any condiments you'd like (onions, black olives, etc.) Serve with sour cream and/or more salsa. Enjoy!
Creamy Cheesecake - Compliments of Ina G.
 One of my last Thanksgiving related posts (better late than never, right?). We skipped the traditional pumpkin pie for a creamy cheesecake with mixed berries. Man-o-man was this good. I think everyone had 2 pieces even after eating all the other food. It was that good.
The recipe was from Ina Garten and was easier than I expected to put together. I did skip the fresh berries called for in the recipe and substituted thawed blueberries, blackberries and raspberries on the side since we had them in the freezer already.
Mixed Berry Cheesecake
Revised slightly from Ina Garten's version
Ingredients
For the crust:
1 1/2 cups graham cracker crumbs (10 crackers)
1 tablespoon sugar
6 tablespoons (3/4 stick) unsalted butter, melted
For the filling:
2 1/2 pounds cream cheese, at room temperature
1 1/2 cups sugar
5 whole extra-large eggs, at room temperature
2 extra-large egg yolks, at room temperature
1/4 cup sour cream
1 tablespoon grated lemon zest (2 lemons)
1 1/2 teaspoons pure vanilla extract
For the fruit:
Frozen fruit mixture (we used blackberries, blueberries and raspberries) with the juice
Directions
Preheat the oven to 350 degrees F.
To make the crust, combine the graham crackers, sugar, and melted butter until moistened. Pour into a 9-inch springform pan. With your hands, press the crumbs into the bottom of the pan and about 1-inch up the sides. Bake for 8 minutes. Cool to room temperature.
Raise the oven temperature to 450 degrees F.
To make the filling, cream the cream cheese and sugar in the bowl of an electric mixer fitted with a paddle attachment on medium-high speed until light and fluffy, about 5 minutes. Reduce the speed of the mixer to medium and add the eggs and egg yolks, 2 at a time, mixing well. Scrape down the bowl and beater, as necessary. With the mixer on low, add the sour cream, lemon zest, and vanilla. Mix thoroughly and pour into the cooled crust.
Bake for 15 minutes. Turn the oven temperature down to 225 degrees and bake for another 1 hour and 15 minutes. Turn the oven off and open the door wide. The cake will not be completely set in the center. Allow the cake to sit in the oven with the door open for 30 minutes. Take the cake out of the oven and allow it to sit at room temperature for another 2 to 3 hours, until completely cooled. Wrap and refrigerate overnight.
Remove the cake from the springform pan by carefully running a hot knife around the outside of the cake. Leave the cake on the bottom of the springform pan for serving.
Once a piece is cut, place a generous amount of thawed berries and juice on each plate.
Menu Plan Monday - Holiday Week
But since we have several days together at home, I am menu planning this week.
Sunday: Tex-Mex Chicken Crunchies (baked not fried)
Monday: Flank Steak with Chimichurri Sauce
Tuesday: Orzo with Italian Sausage and Peppers
Wednesday: Mr. Gooch - FITF (Forage in the Fridge). Me - Out of Town
Thursday: Mr. Gooch - FITF. Me - Out of Town
Friday: Leftovers from my parent's house including Honey Baked Ham (yum!)
Saturday: With Mr. Gooch's family to celebrate the holiday
Sides will include salad, veggies (carrots, corn, green beans) and a starch (potato, rice or pasta).
Lunches are leftovers, soup or sandwiches.
Breakfast is cereal, oatmeal, scones or muffins.
Don't forget to visit www.orgjunkie.com to see other menu plans to get some additional meal ideas.
It's a DIY Christmas - Stamped Porcelain Tile Magnets
 To coordinate with the stamped tumbled tile coasters, I also created stamped porcelain tile magnets.
Just like the coasters, these are a quick and easy addition to any kitchen, gift basket or hostess gift.
Supplies
Sheet of 2 x 2 inch porcelain tiles (36 total tiles)
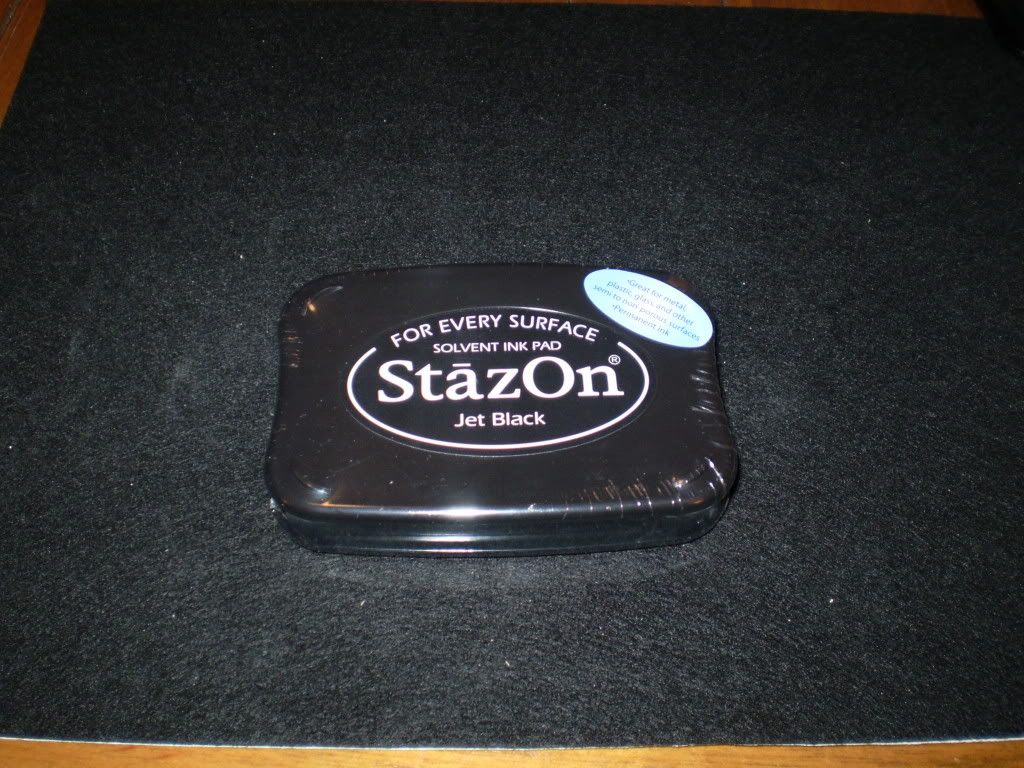
StazOn Stamping Ink (this is a permanent stamping ink)
All Purpose Adhesive Glue
Magnets (I use 2-1/2 inch magnets per tile)
Stamps
Rubbing alcohol (to remove the ink in case the stamped images get smudged)
Directions:
1. Remove tiles from backing. You may need to soak them in water overnight and scrub the backs a bit to loosen the glue.
 2. Let tiles completely air dry.
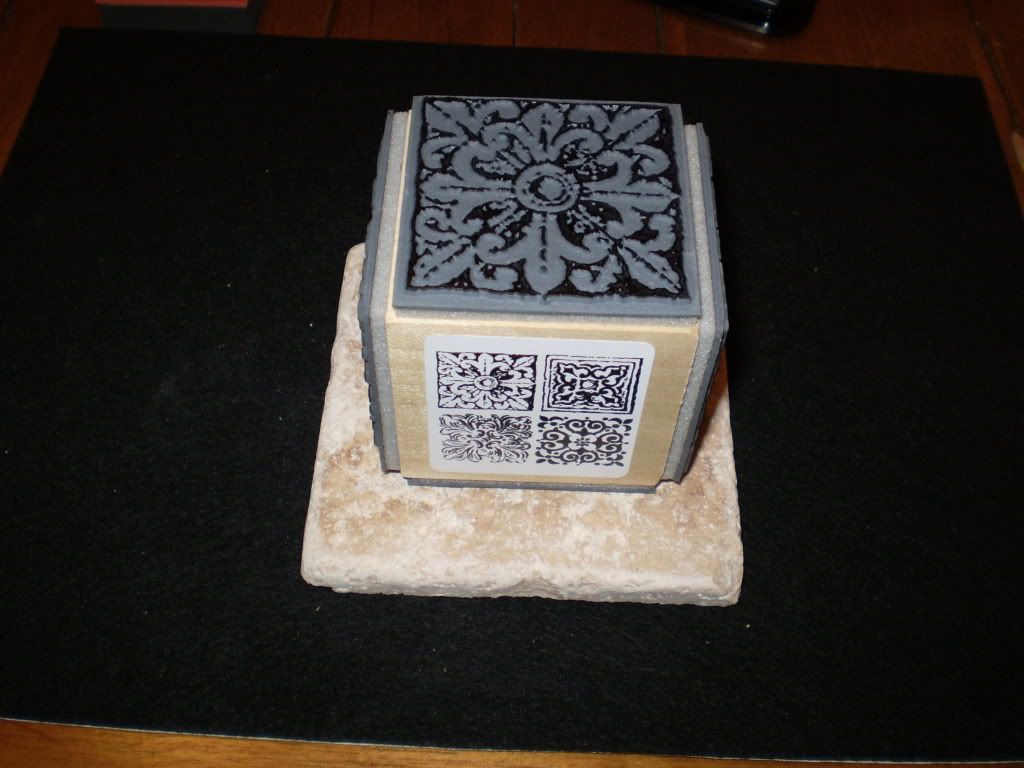
3. Place dry tile in center of your work area.
4. Select your stamp color.
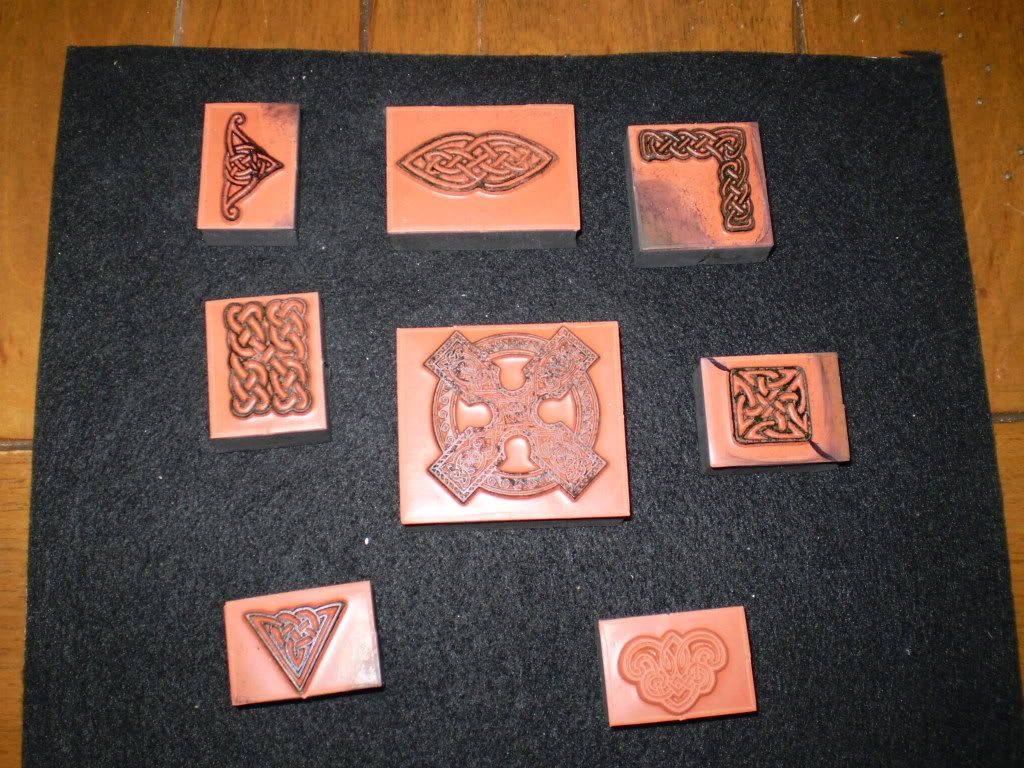
5. Select your stamp.
6. Ink entire image, taking care to wipe off any excess that may have gotten on the edges of the stamp.
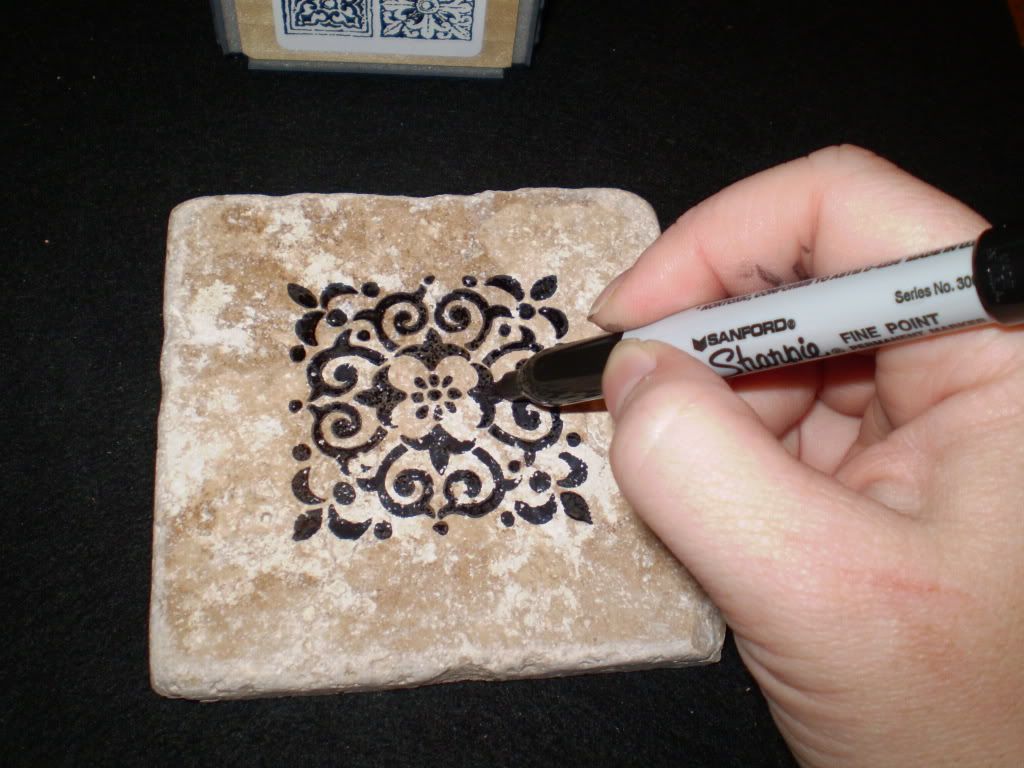
7. Line up stamp and press stamp with steady pressure onto tile, making sure to not "jiggle" the image. (If you make a mistake at this point, you can use the rubbing alcohol on a paper towel to remove the ink). 8. Fill in any spaces in the image on the tile with permanent marker of the same color.
9. Let ink dry for 15 to 20 minutes, then place tile onto a cookie sheet and place in oven preheated to 375 degrees for 12-15 minutes. 10. Let cool completely.
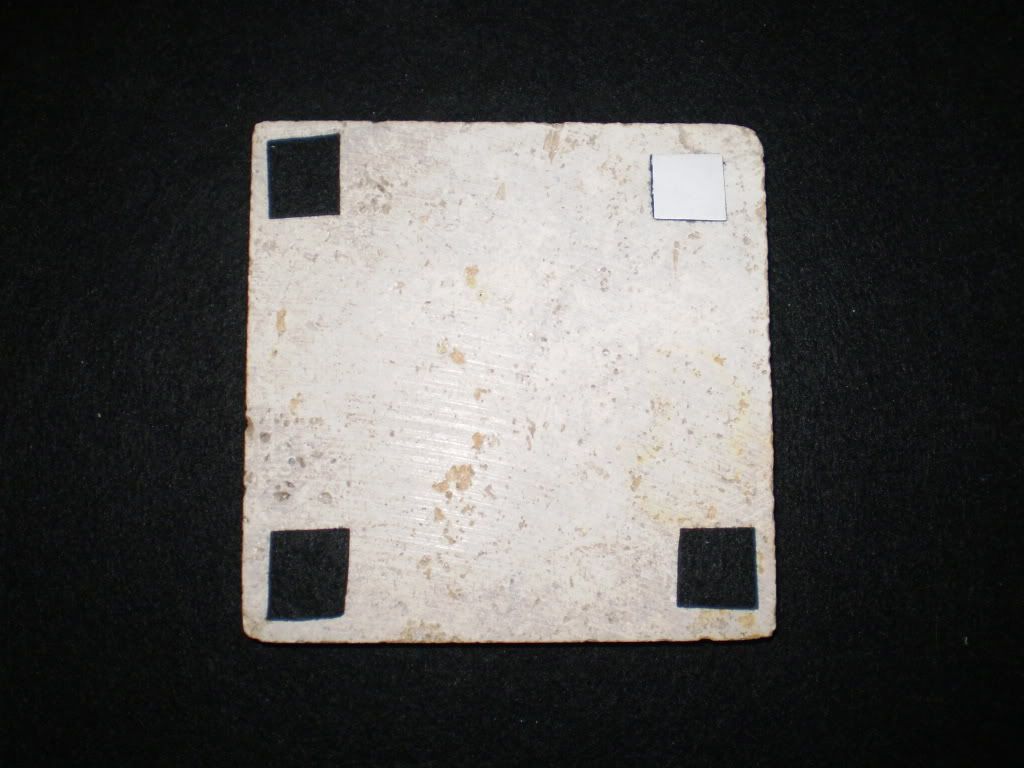
11. Apply magnets to back of tile with adhesive. Let dry overnight.
 12. Place magnets into an organza bag for gift giving.
Thyme Roasted Sweet Potatoes
 Oh my. My recent love affair with the sweet potato continues with this recipe. You see, I had never had a sweet potato before Mr. Gooch came into my life. Well, other than a taste of what I remember to be a sickly sweet pie at some point. This slightly savory version of the baked sweet potato is right up my alley. I hope you enjoy it as much as we did.
This recipe for thyme roasted sweet potatoes from Epicurious.com is right up my alley.
Thyme Roasted Sweet Potatoes
Source: Epicurious.com
Ingredients
4 medium sweet potatoes, peeled and cut into 1 1/2-inch-thick rounds (I cut mine thinner and into half rounds)
3 tablespoons olive oil
4 large garlic cloves, minced
1/3 cup fresh thyme leaves, plus 6 thyme sprigs for garnish (I used 5 teaspoons of dried thyme)
1/2 teaspoon kosher salt
1/2 teaspoon red pepper flakes (I added a bit more since I like a little heat)
Directions
Preheat oven to 450°F.
In large mixing bowl, combine all ingredients and toss.
Arrange potato slices in single layer on heavyweight rimmed baking sheet or in 13x9-inch baking dish.
Place on top rack of oven and roast until tender and slightly browned, about 40 minutes.
Serve warm or at room temperature, garnished with thyme sprigs.
Who Doesn't Like Fiestaware? And a Giveaway to Boot!

Visit "Ravings of a Mad Housewife" to get the details and to enter. You even get to pick the colors.
The drawing is Christmas eve.
Flowers in the Garden - December Edition
Christmas is rapidly approaching. Snow is on the ground. Spring flowers are just a distant memory. Except here.
Enjoy the Lilies for the holidays.
It's a DIY Christmas - Oreo Truffles
 The final truffle to be included in our gift boxes is the crowd pleasing Oreo Truffle.
To be perfectly honest, I have no idea where I got this recipe from. There seem to be a million places you can find it out there on the web. None the less, they are some of the most tasty truffles around.
We coated ours in white chocolate and a milk chocolate ganache. Yum!
Oreo Truffles
Ingredients
1 package oreos
14 oz. condensed milk
1/2 tsp. vanilla extract
Almond bark, chocolate chips or melting chocolate
Directions
First, crush the oreos in a ziploc bag or a food processor (I used the food processor)
Add the condensed milk and mix together
Form into small balls and place in the freezer to set for about half an hour
In the meantime, prepare your melting chocolates in the microwave or double boiler
Dip the balls in chocolate and allow to cool on parchment or mini candy cups
It's a DIY Christmas - Peppermint Truffles
 Another truffle to be included in our gift box is the Peppermint Truffle.
Armed with the Peppermint Truffle recipe from Good Things Catered, I was a truffle making machine.
A few tips are that I would have is to use latex gloves to keep your hands from heating up the truffle mixture when rolling it into the balls. Additionally, when dipping the truffles into the chocolate, I used one gloved hand to dip the truffle (on a toothpick) and the other to roll in the crushed peppermint candies.
These are a tasty addition to everyone's gift box.
Peppermint Truffles
Ingredients
16 oz. white chocolate, divided
4 oz. pink candy melts
1/2 c. heavy cream
1/8 tsp peppermint extract
1/8 tsp vanilla extract
12 candy canes (I used a bag of crushed Starlight mints)
Directions
In medium bowl, combine 12 oz. white chocolate, pink candy melts, and heavy cream
Heat in microwave, checking and stirring frequently until completely melted and smooth
Add peppermint and vanilla extracts, stirring well to incorporate and place bowl in the fridge for at least 4 hours)
When completely cooled, roll tsp of truffle filling into balls, place on cookie sheet and place in freezer
Crush candy canes, place in small bowl and set aside
Melt remaining white chocolate until smooth
Remove truffles from freezer, then dip into white chocolate and then into crushed candies
Place finished truffle into truffle cup, repeat with remaining truffles
Let stand for 1 hour or until completely dry and serve or package in airtight container for up to a week
It's a DIY Christmas - Irish Cream Liqueur Truffles
 We are giving boxes of truffles, along with the stamped tumbled marble tiles, stamped porcelain magnets (post to come) and chocolate dipped spoons.
One type of truffle included in the box is the Chocolate Irish Cream Liqueur Truffle.
I had to try one (taste testing you know) and these are so freaking good. It is a good thing we are giving them all away. I could see that they would be difficult to resist.
Irish Cream Liqueur Truffles
Source: iChef.com
Ingredients
12 oz semisweet chocolate chips
1/4 c heavy cream
1 tbsp sweet butter
2 egg yolks
1/4 c Irish Cream Liqueur (I used Carolan’s)
Directions
Melt chocolate, Bailey's and heavy cream together over very low heat.
Whisk in yolks, one at a time; mixture will thicken.
Whisk in butter. Refrigerate overnight, or until firm.
With spoon make small balls.
Roll in your choice of powdered sugar, cocoa, chopped nuts, sprinkles, etc. (I drizzled pink chocolate left over from the peppermint truffles)
How many truffles you get depends on how big or small you make them.
We have a Winner! (Sorry for the Delay)
 Sorry for the delay in announcing the winner of the giveaway. We had guests then I was under the weather.
But here it is...with the number generated by www.random.org is 13, the winner is quinn.
quinn, I need you to contact me via email at gooch100@gmail.com so I can get these tiles in the mail ASAP.
I hope you enjoy them and watch the blog for another giveaway after the first of the year.
Saturday, December 20, 2008
It's a DIY Christmas - Chocolate Dipped Spoons
 A quick, easy, cute, quick (and inexpensive) holiday gift is the chocolate dipped spoon.
These are going to be included with the boxes of truffles we are giving as part of our holiday gifts.
The best part is that you only need a few ingredients and about an hour to create a wonderful addition to any gift basket or box. I also think that I will make these whenever I need a hostess gift to include with a couple of cute coffee mugs.
Ingredients/Utensils:
Plastic spoons
Milk chocolate chips
Semi-sweet chips
White chocolate chips (for decoration)
Crushed peppermints (for decoration)
Parchment paper
2 Cookie sheets
Ziploc sandwich bag Directions:
Wash and dry spoons
Divide spoons into two equal groups
Line cookie sheets with parchment paper
Melt milk chocolate chips (either in microwave or in a double boiler)
Dip half of the spoons into the melted chocolate making sure both the front and back are covered, allowing extra chocolate to drip off
Place covered spoons onto parchment paper
If adding crushed peppermint, place small quantity onto the chocolate before it hardens
Melt dark chocolate chips (either in microwave or in a double boiler)
Dip half of the spoons into the melted chocolate making sure both the front and back are covered, allowing extra chocolate to drip off
Place covered spoons onto parchment paper
Let harden completely
Melt small quantity of white chocolate chips and place into a Ziploc bag
Snip corner of bag and pipe white chocolate over the spoons
Once all chocolate has hardened (about 1 hour or so), they can be placed in bags for gift giving.
Wednesday, December 10, 2008
That Perfect Thing! - My New Etsy Shop
Well, its official. After Mr. Gooch saw how much fun I was having putting together my magnets and coasters that he encouraged me to open an Etsy shop.
So here it is. Just in time for the holidays.
That Perfect Thing.
The items in my shop are perfect for housewarming presents, hostess gifts, inclusion in gift baskets as well as having on hand for those last minute occasions that require a small gift.
There are stamped and unstamped natural marble or stone magnets; stamped and unstamped marble tile coasters; stamped and unstamped trivets and bottlecap magnets.
Sunday, December 7, 2008
Menu Plan Monday
With that, I am onto this week's menu. Again, I am filling with our favorites plus one new (and tasty sounding) recipe.
Sunday: Forage in the Fridge (FITF)
Monday: Pot Roast with Herbs
Tuesday: Turkey Spaghetti Pie
Wednesday: Rotisserie Chicken
Thursday: Sauteed Herbed Salmon with Creamy Leeks and Bacon
Friday: FITF
Saturday: Either FITF or eating out
Leftovers will be used on FITF nights or for lunches.
I am going to make some muffins for breakfasts and snacks.
Thursday, December 4, 2008
My First Giveaway - Stamped Tile Coasters

As you saw in an earlier post, I am making stamped tile coasters to include in our Christmas gift baskets this year.
I love them so much, I want to share a set of 4 coasters with one lucky winner.
Leave a comment to this post between now and 11:59 pm on December 15, and I will draw the name of the lucky winner via the random integer number generator on random.com on December 16. That way you will have them in time for the holiday.
Good luck and happy holidays.
Additionally, if you are interested in purchasing a set(s), please email me at gooch100@gmail.com for more info on the designs available. The cost of a set of 4 coasters is $12 + shipping ($5 for first set and $2 for each additional set).
Wednesday, December 3, 2008
Alton Brown - My Food Crush (All because of some Turkey and Gravy)
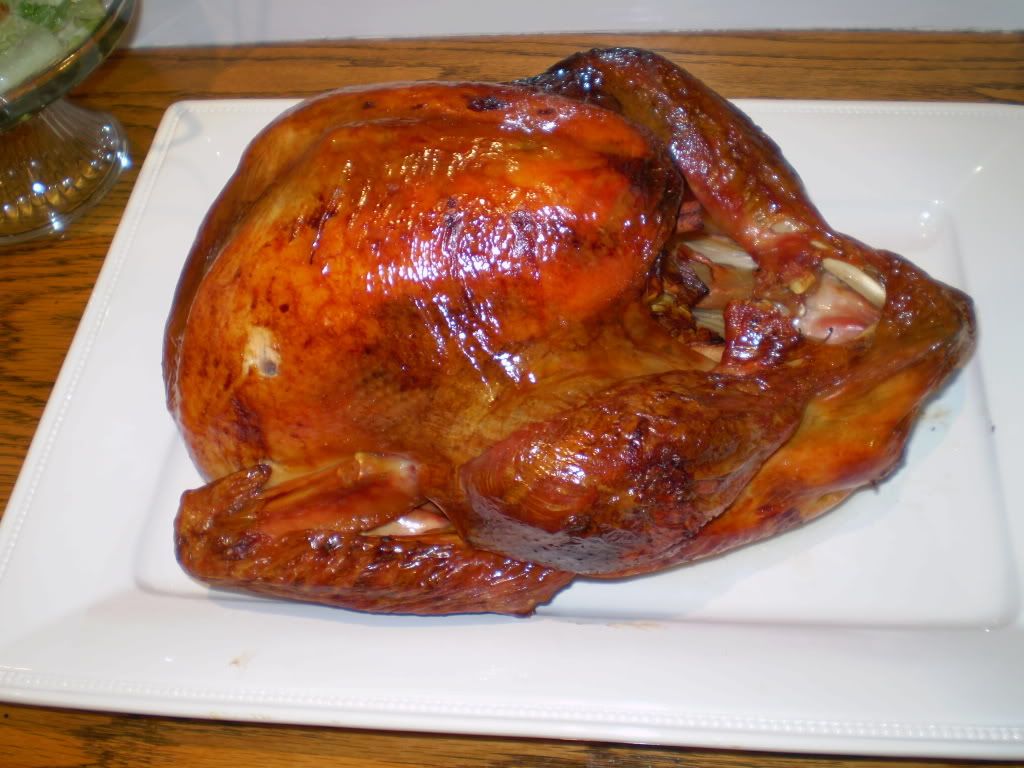 I have a new food crush. Alton Brown from Food Network is the man!
Why do I feel this way, you ask? What is it that inspires my new devotion? It is all because of my search for the perfect Turkey recipe using brine and a good gravy recipe.
Alton not only had recipes, he has a video on how to make the gravy. As both a turkey and homemade gravy virgin, this was absolutely imperative. So at this point we have a win (recipe) win (video) situation.
Once we made the turkey and the gravy, I realized that this was actually a win win win win situation. Those last two were for the great tasting turkey, so moist I couldn't believe it and a gravy that Mr. Gooch can't get enough of.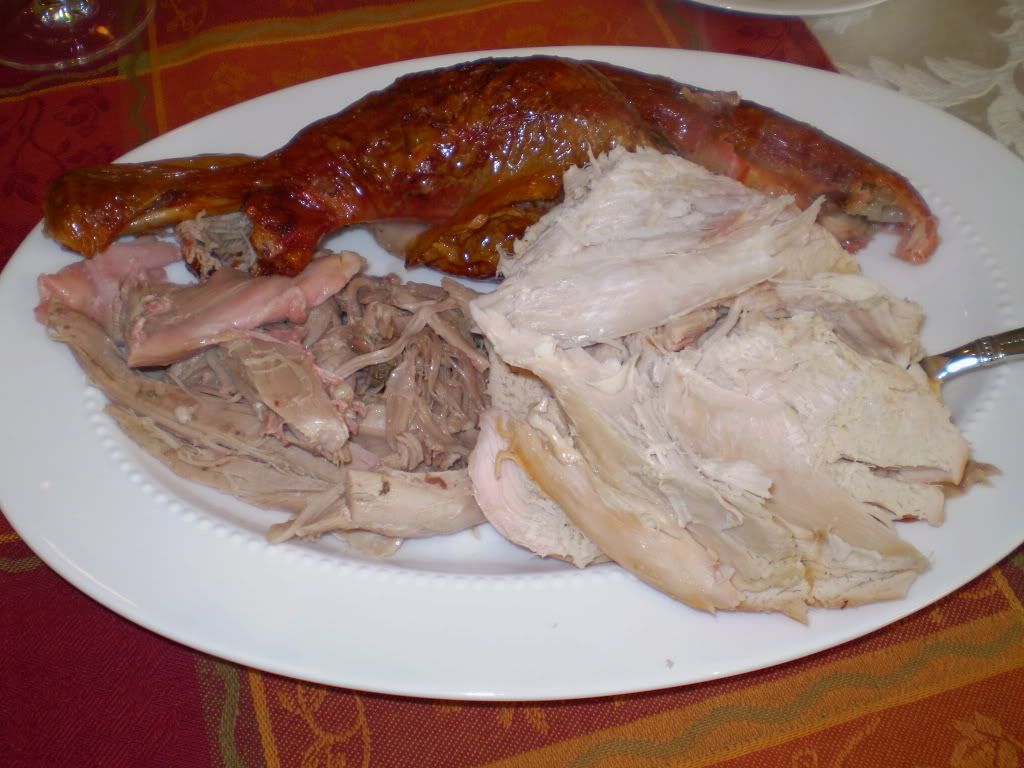
Good Eats Roast Turkey
To view the recipe on the Food Network site, click here.
Ingredients
1 (14 to 16 pound) frozen young turkey
For the brine:
1 gallon vegetable stock
1 cup kosher salt
1/2 cup light brown sugar
1 tablespoon black peppercorns
1 1/2 teaspoons allspice berries
1 1/2 teaspoons chopped candied ginger
1 gallon heavily iced water
For the aromatics:
1 red apple, quartered
1/2 onion, quartered
1 cinnamon stick
1 cup water
4 sprigs rosemary
6 leaves sage
Canola oil
2 to 3 days before roasting:
Begin thawing the turkey in the refrigerator or in a cooler kept at 38 degrees F.
Combine the vegetable stock, salt, brown sugar, peppercorns, allspice berries, and candied ginger in a large stockpot over medium-high heat.
Stir occasionally to dissolve solids and bring to a boil.
Then remove the brine from the heat, cool to room temperature, and refrigerate.
Early on the day or the night before you'd like to eat:
Combine the brine, water and ice in the 5-gallon bucket.
Place the thawed turkey (with innards removed) breast side down in brine.
If necessary, weigh down the bird to ensure it is fully immersed, cover, and refrigerate or set in cool area for 8 to 16 hours, turning the bird once half way through brining.
The Day you are eating:
Preheat the oven to 500 degrees F.
Remove the bird from brine and rinse inside and out with cold water. Discard the brine.
Place the bird on roasting rack inside a half sheet pan and pat dry with paper towels.
Combine the apple, onion, cinnamon stick, and 1 cup of water in a microwave safe dish and microwave on high for 5 minutes. Add steeped aromatics to the turkey's cavity along with the rosemary and sage. Tuck the wings underneath the bird and coat the skin liberally with canola oil.
Roast the turkey on lowest level of the oven at 500 degrees F. for 30 minutes.
Insert a probe thermometer into thickest part of the breast and reduce the oven temperature to 350 degrees F.
Set the thermometer alarm (if available) to 151 degrees F.
A 14 to 16 pound bird should require a total of 2 to 2 1/2 hours of roasting.
Let the turkey rest for at least 15 minutes before carving.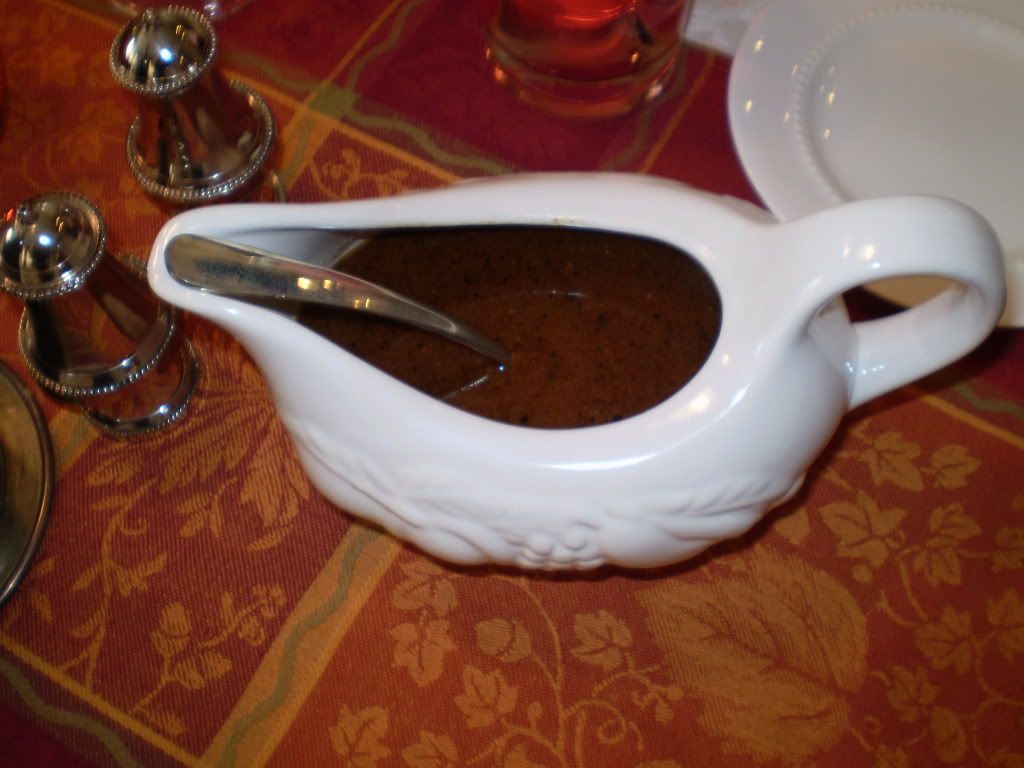 Perfect Turkey Gravy
Ingredients
1 Good Eats Roast Turkey, recipe above
24 ounces reduced sodium chicken broth
8 ounces red wine
1/3 cup all-purpose flour
1 tablespoon fresh herbs such as oregano, thyme or rosemary
Kosher salt
Freshly ground black pepper
Directions
Remove the turkey from the roasting pan and set aside to rest.
Leave the drippings from the turkey in the pan and place the roasting pan over medium heat.
Add the broth and wine at the same time. Whisk to combine, scraping the bottom of the pan until all of the bits have come loose.
Cook for another 2 to 3 minutes in order to reduce the mixture slightly.
Transfer the liquid to a fat separator and let sit for 5 minutes to allow fat to separate.
Return 2/3 to 3/4 cup of the fat to the roasting pan and place over medium-high heat. Discard any remaining fat.
Add the flour and whisk to combine. Cook, whisking continuously, until the mixture starts to thicken and become smooth, approximately 2 to 3 minutes.
Once this happens, gradually add the liquid back to the pan and whisk until smooth and you have reached your desired consistency, approximately 5 to 6 minutes. Remember, your gravy should be slightly thin in the pan as it will thicken once you serve it.
Add the herbs and whisk to combine.
Season with salt and pepper.
Tuesday, December 2, 2008
A Great Giveaway - A Flight of Salts
Everyone has heard of a flight of wine, right? This is one of my favorite things to be had at my local wine bar.
However, I just learned that there is such a thing as a flight of salts. What a great idea. I love salt and I love seasonings and spices so this is right up my alley. Even better, Marx Foods is having a salt giveaway. For more info on the salt flight giveaway and instructions on how to enter for yourself, please visit here.
The salt collection includes:
Truffle & Salt: A blend of dried Italian black truffle and sea salt, this flavor combination will enhance any dish with the aroma and flavor of Italian truffles including popcorn, mashed potatoes, pasta dishes, scrambled eggs and roasted meats.
Fiori & Salt: An aromatic blend of Italian sea salt and flowers including chamomile, poppy, mallow, marigold, lime, hawthorn, yarrow, wild orange peel, flower pollen, heather and lavender. This combination is a wonderful way to infuse olive oils, sprinkle over fresh mozzarella, finish cream soups and risotto or bake into breads.
Fennel &Salt: A combination of sea salt, fennel seed and orange peel this blend pairs well with sweet and savory dishes including wild salmon, goat cheese, chocolate truffles or caramel.
Sweet & Salt: A sweet and savory blend of Italian sea salt, dried & ground fruit, sweet spices, vanilla, chocolate and grape must, this combination pairs well with both aromatic and dessert dishes. Sweet & salt can be used as a rub for duck or pork, sprinkled on roasted squash, pumpkin soup, or buttery shortbread cookies.
Saffron & Salt: Red strands of saffron are blended with sea salt resulting in a flavor profile that is perfect for finishing paella, cioppino, pasta or fresh ricotta.
Sea & Salt: A combination of high-quality Sicilian bottarga, citrus, sun-dried tomato, and cardamom, this blend is ideal with pasta, steamed vegetables or used to cure seafood and enhance salad dressings.
Limited Edition Cervia Salt: From Cervia salt pans, this Italian moist fleur de sel is the crème de la crème of sea salts. With a light texture and rich flavor this salt can be used to finish meat, poultry and fruit dishes as well as sweets including white chocolate chip cookies and caramel chocolate combinations.
Orange Ginger Cranberry Muffins - Tasty Thanksgiving Leftovers
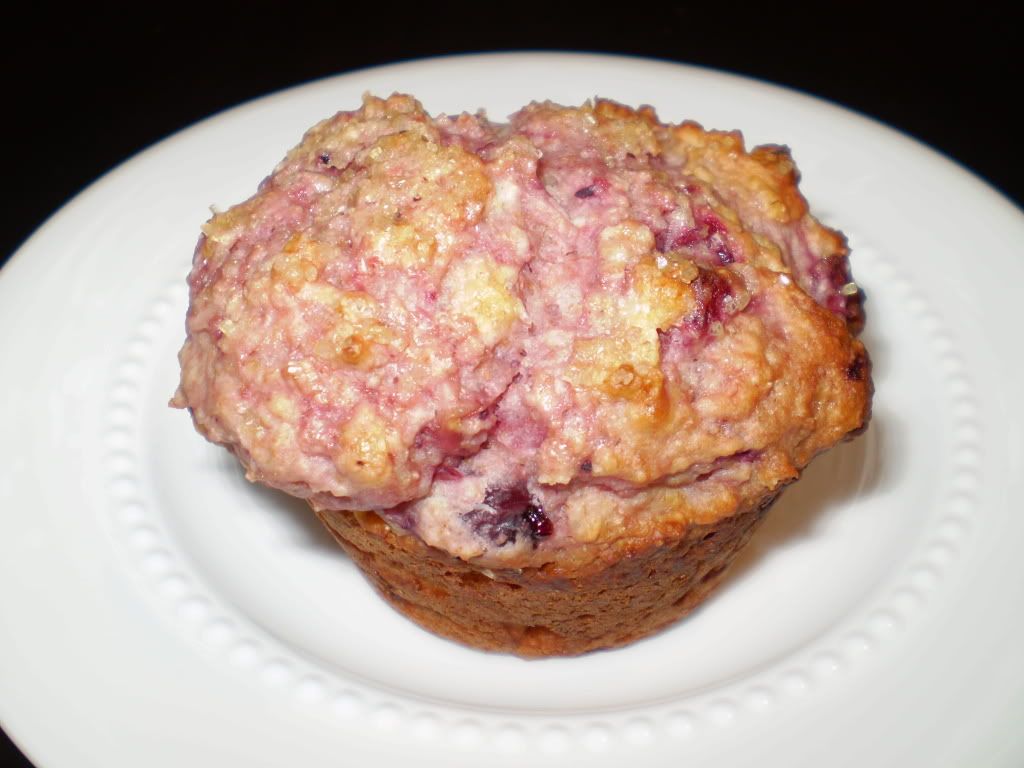 What to do with our leftover cranberry sauce? I was feeling a bit stumped until I saw this post on Joelen's Culinary Adventures for Cranberry Orange Sour Cream Muffins. While I didn't have any sour cream, I knew I could substitute yogurt so I was off to the kitchen to make muffins.
While I wish I had added a bit more of the cranberry sauce and some candied ginger for some additional zip, these are still VERY good muffins.
Mr. Gooch had one for breakfast and declared them delicious. That is good enough for me!!
Orange Ginger Cranberry Yogurt Muffins
Source: Joelen's Culinary Adventures and Sharing a Table Cookbook
Ingredients
1 1/2 cups all purpose flour
1 cup whole wheat flour
1 tablespoon baking powder
1/4 teaspoon salt
1/4 cup sugar
1 egg
1/4 cup canola oil
1 + 1/2 cups low fat plain yogurt
1 cup orange ginger cranberry sauce
Directions
Preheat the oven to 400 degrees. In a medium bowl, sift together the flour, salt, and baking powder and set aside. In another bowl, beat the egg and oil together. Stir in the sour cream.
Make a well in the dry ingredients and mix in the wet ingredients until the batter coheres. The consistency should be closer to that of biscuit dough than batter. Be careful not to over mix.
Fold in any additional ingredients gently. Spook into muffin tins that have been sprayed well with vegetable oil. Bake 20 to 25 minutes or until golden brown.
Orange Ginger Cranberry Sauce - Cranberry with a Zing
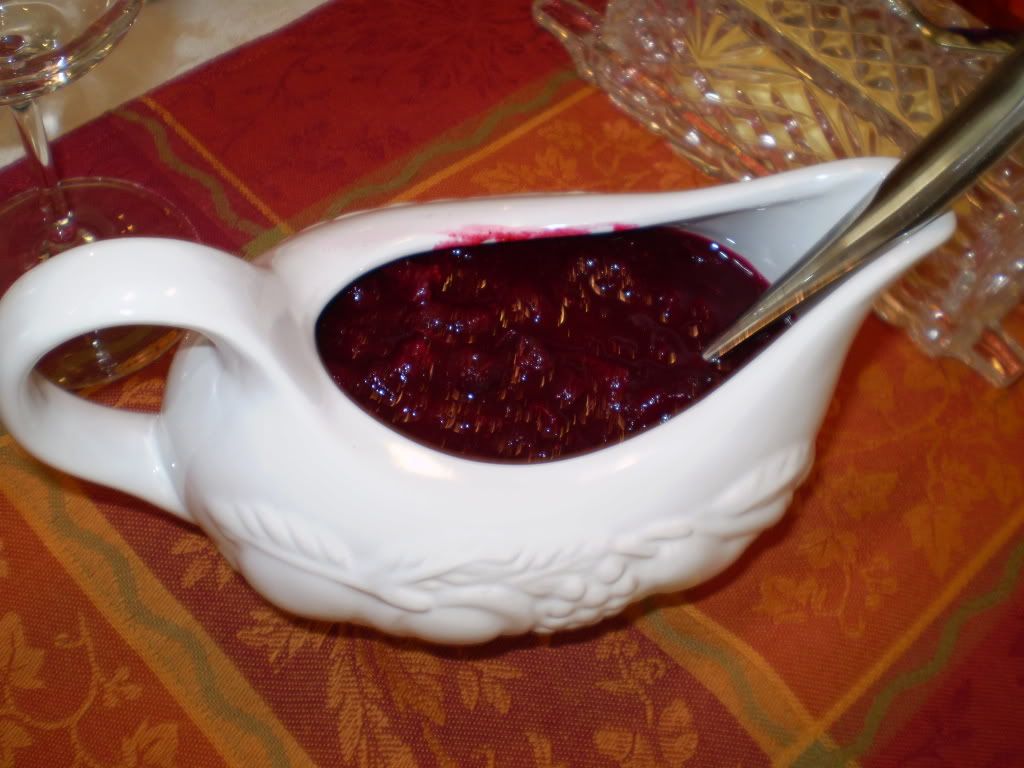 I have realized over the last few months that I LOVE ginger. So when I saw this recipe on Money Saving Mom for Orange Ginger Cranberry Sauce, I knew I had my recipe.
The sauce was definitely zingy and that was a nice compliment to our other dishes. I will definitely make this again. I may make up a double batch s coming weekend and freeze individual portions for use throughout the year with various meals.
Homemade Orange Ginger Cranberry Sauce
Source: Erin at $5 Dinners
Ingredients
1 bag fresh cranberries (the bag I used was 12 oz.)
1 orange, juiced (I used about 1/4 cup of OJ)
1 teaspoon orange zest
½ teaspoon ground ginger
¼ cup sugar
Directions
Rinse cranberries.
Pick out any cranberries that are white in color or have "gushy" spots.
Place cranberries in sauce pan with 2 inches of water, or apple juice.
Boil for 10 minutes, then reduce heat and let simmer for 5 minutes to allow the sauce to thicken.
While boiling, add the juice from one orange.
Add 1 teaspoon orange zest to the sauce.
Cranberries will "pop" while boiling!
Add ¼ cup sugar to the cranberries. Add more sweetener for sweeter sauce, or less sweetener for a more tart sauce. Add ½ - 1 teaspoon of ground ginger.
Allow sauce to sit for at least 10 minutes to "thicken" a bit more.
TWD: Lizner Sables
No Tuesdays with Dorie Linzer Sables for me this week, though you can find the recipe on page 134 and 135 of Baking: From My Home to Yours.
This week I need to make cookies that will ship well as part of Baking GALS and unfortunately this cookie is not one of those types.
However, if shipping is not a concern and you are looking for a beautiful cookie for your holiday dessert spread. This is the cookie for you.
Look for a post on Grandma's All-Occasion Sugar Cookies next week (pages 146 and 147). This cookie fits my needs for shipping.
Monday, December 1, 2008
Yup, It's December - Definitely Winter Time!!
It is definitely December here in Chicagoland.
How do I know?
I woke up to this view out my kitchen window.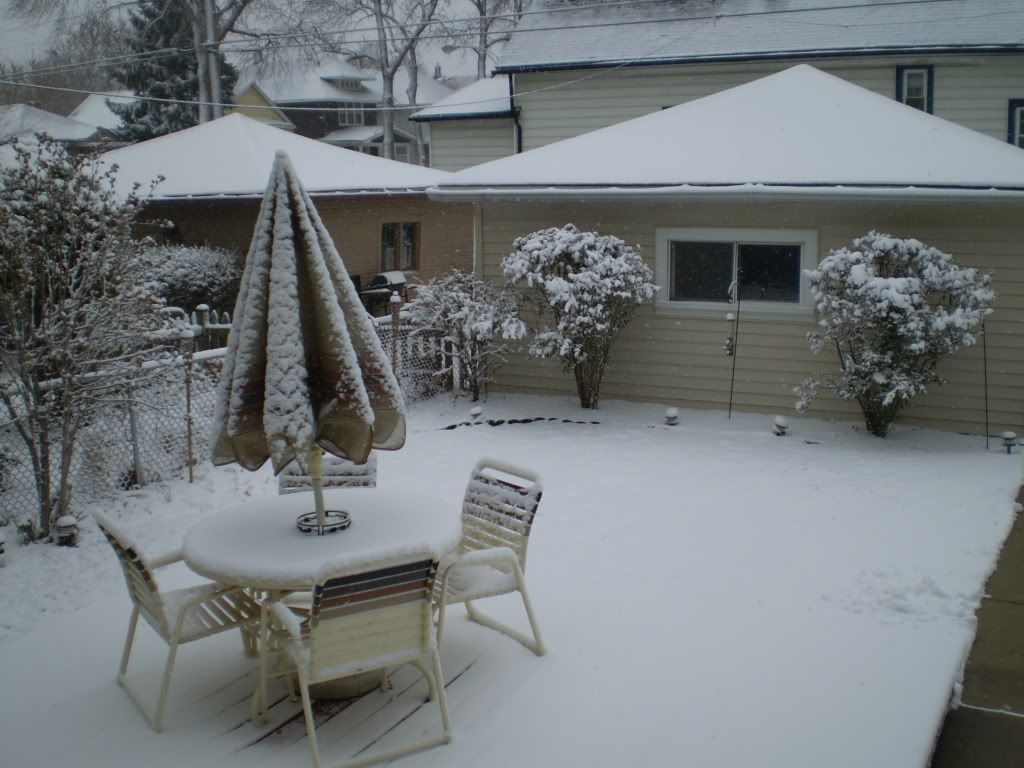 SNOW!
SNOW!
And not just the measly dusting we have gotten a few times in the past few weeks. This looks like it might be here to stay.
I figured that since there was snow on the ground, I had better get a step on putting up our holiday decorations and making new pillow covers for the living room. I don't think orange and yellow (the color of our current pillow covers) are very "holiday."
Look for a post in the coming week or so on our holiday decorations.
Mashed Potato Pancakes - Another Thanksgiving Leftover Idea

We had plenty of mashed potatoes left over from our Thanksgiving dinner and while I love them plain, I wanted to mix things up a bit.
By adding some cheddar cheese and bread crumbs to the potatoes

I then created patties and placed them in a heated non stick skillet with a bit of butter.

Let the patty brown on each side then serve when warm.

Mashed Potato Patties
Ingredients
(I just eyeballed the amounts)
Mashed Potatoes
Cheddar Cheese
Bread Crumbs
Directions
Heat skillet over medium to medium heat
Combine all ingredients
Shape into small patties
Cook in skillet until brown on each side
Serve when warm
Not Your Grandma's Mashed Potatoes - Baked Mashed Potatoes with Parmesan Cheese and Bread Crumbs

I love potatoes. I love love love mashed potatoes. Add two types of cheese and I am in heaven.
So when I saw this recipe from Giada Di Laurentiis on the Food Network web site, I knew this was our Thanksgiving potato dish.
While the recipe says you can prepare up to 6 hours prior, I actually prepared the potatoes the night before and added the Parm and bread crumb topping right before I put the dish in the oven.
It was definitely a tasty dish. The only changes I would suggest were adding a bit more Parmesan cheese to the potatoes as well as adding some roasted garlic. But then again, I like garlic in just about every type of food I eat.
And there were enough left over for Mashed Potato Pancakes (post on that dish coming later today).
Baked Mashed Potatoes with Parmesan Cheese and Bread Crumbs
Ingredients
1 tablespoon butter
4 pounds russet potatoes, peeled, cut into 1-inch pieces
1 cup whole milk
1/2 cup (1 stick) butter, melted
1 1/2 cups grated mozzarella
1 cup freshly grated Parmesan
Salt and freshly ground black pepper
2 tablespoons plain dry bread crumbs
Directions
Preheat the oven to 400 degrees F.
Coat a 13 by 9 by 2-inch baking dish with 1 tablespoon of butter and set aside.
Cook the potatoes in a large pot of boiling salted water until they are very tender, about 15 minutes.
Drain; return the potatoes to the same pot and mash well.
Mix in the milk and melted butter.
Mix in the mozzarella and 3/4 cup of the Parmesan.
Season, to taste, with salt and pepper.
Transfer the potatoes to the prepared baking dish.
Stir the bread crumbs and remaining 1/4 cup of Parmesan in a small bowl to blend.
Sprinkle the bread crumb mixture over the mashed potatoes.
Recipe can be prepared up to this point 6 hours ahead of time; cover and chill.
Bake, uncovered, until the topping is golden brown, about 20 minutes.
Sunday, November 30, 2008
Menu Plan Monday
This week we will be working our way through the rest of our turkey leftovers. Even after making soup and a salad we still have quite a bit left.
Sunday: Forage in the Fridge
Monday: Turkey Quesedillas (using this recipe)
Tuesday: Turkey with Pasta
Wednesday: Homemade Pizza
Thursday: Turkey Bacon Ranch Calzones (if we are out of turkey, we will have chicken)
Friday: BBQ Beef in the slow cooker
Saturday: Mr. Gooch is out of town so who knows
Turkey Noodle Soup and Stock
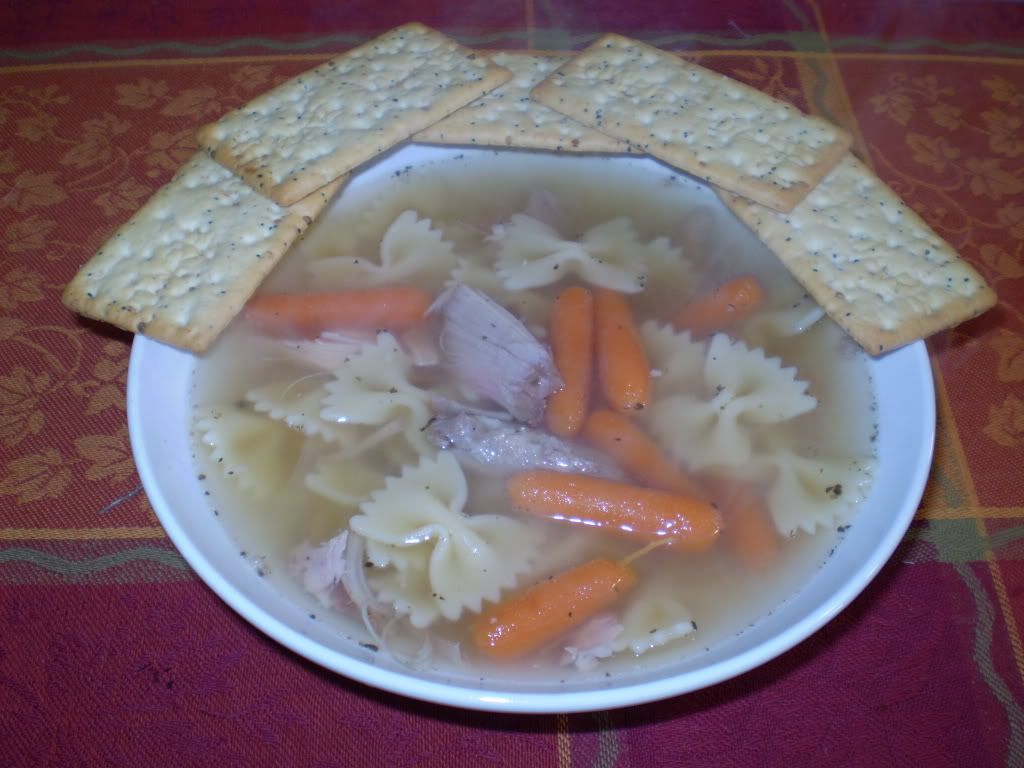 Since we had a 13 pound turkey and only 4 people at dinner, it goes without saying that we had lots of leftovers. We have already started eating our way through them at quite a rapid pace. I suppose it helps that we both love turkey.
This afternoon, we had turkey noodle soup for lunch. Using the turkey stock I made yesterday, this was a tasty way to use up more of our leftovers.
There was enough made to bag up and freeze for future consumption.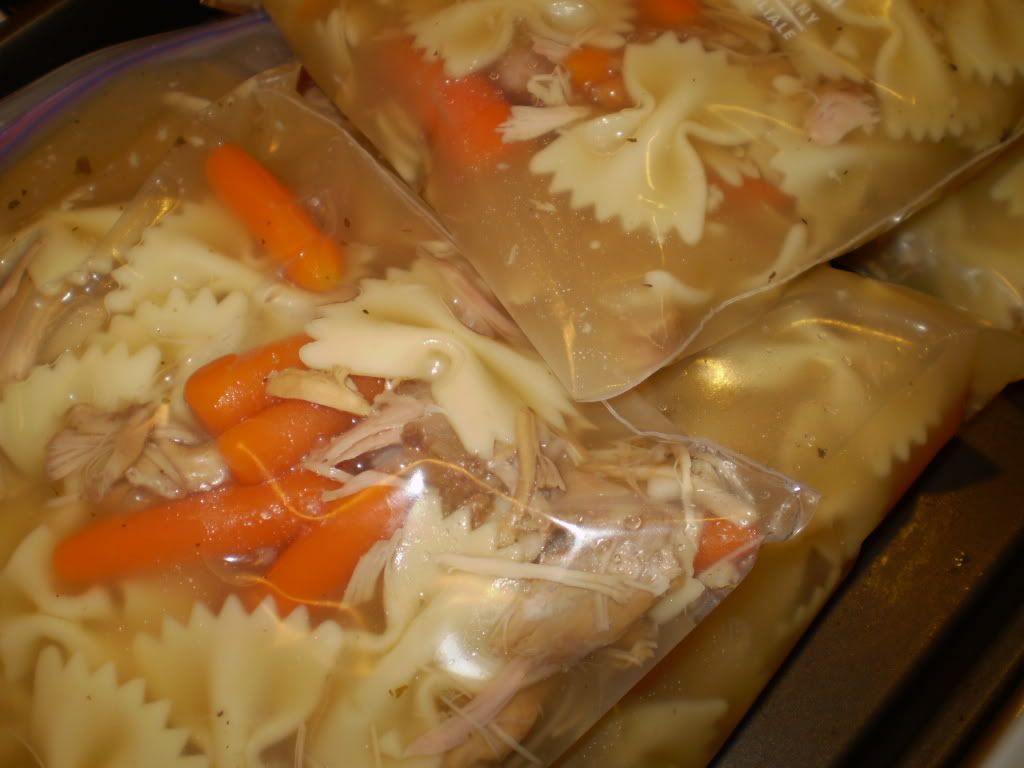 Turkey Noodle Soup
Ingredients
Turkey stock (recipe below)
Carrots reserved from making stock
Pasta (I used bow tie pasta)
Turkey reserved from making stock
Directions
Place strained stock in stockpot
Add pasta.
Bring to boil and cook according to directions.
With 2 minutes left in pasta cooking time, add carrots and turkey.
Serve with crackers.
Turkey Stock
Ingredients
1 turkey carcass, wrapped in cheesecloth
2 cups carrots
2 onions, chopped
1 bunch green onions, chopped
1 head garlic, peeled
2 tablespoons Italian Seasoning
1 tablespoon Oregano
1 bunch Celery, chopped
5 Bay leaves
Directions
Place cheesecloth wrapped turkey, carrots, onions, green onions, garlic, celery and seasonings into a large stockpot.
Fill stockpot with water, almost to the top, covering all contents.
Bring to boil then reduce to low simmer.
Simmer for 3-4 hours.
Remove stockpot from heat and let cool completely.
Once cooled, remove the cheesecloth covered turkey and place onto a cookie sheet.
Remove all the turkey meat from the bones and reserve for soup.
Discard the bones.
Strain stock into a large bowl.
Remove carrots and reserve for making soup.
Discard the rest of the vegetables and bay leaves.
Family Favorite from Mr. Gooch's Mom: Scalloped Corn
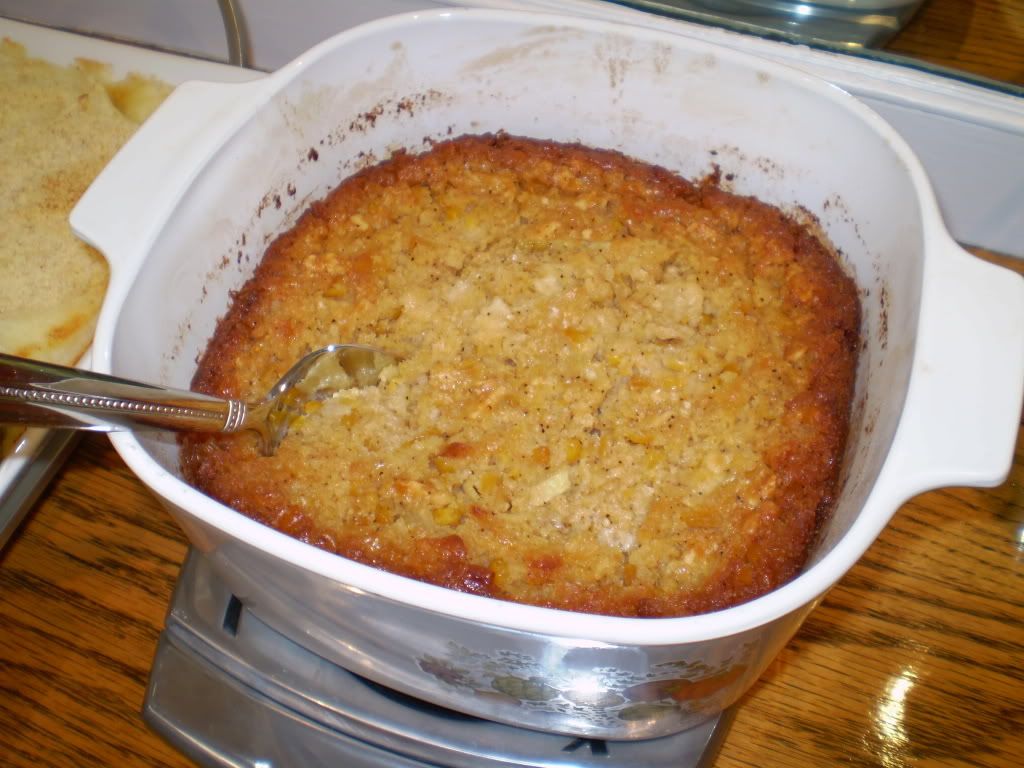 This dish is a traditional Thanksgiving dish for Mr. Gooch's family. It is served every year and at most major family gatherings.
My mother-in-law didn't even have the recipe written down so I had to ask her to type it up for me.
Scalloped Corn
Ingredients
2 whole eggs, well beaten
1 can evaporated milk (sweetened condensed milk can be used if you wish
1 medium onion, finely chopped
1 Tsp. garlic salt
1 Tsp. black pepper
2 cans creamed corn
1 sleeve saltine crackers, finely crushed
3 tablespoons butter
Directions
Preheat oven to 350 degrees
In a large glass bowl, mix eggs, evaporated milk,onion, garlic salt, and black pepper well.
Add creamed corn, making sure mixture is combined completely.
Mix in finely crushed saltines until thoroughly incorporated.
Butter 9 x 9 deep casserole dish with 1 tablespoon of butter, leaving some butter at corners.
Pour corn mixture into dish. Add two tablespoons of butter on top and finish with additional garlic salt and black pepper.
Bake approx. 45 mins. to one hour.
Thursday, November 27, 2008
Happy Thanksgiving - A Quick Review of the Day's Recipes
 I hope everyone is having a wonderful Thanksgiving!
Mr. Gooch and I had a great day with his mother and grandmother and we all ate until we thought we were going to burst.
I will be blogging about all the recipes we made for today in the coming days, but I wanted to give a quick review of each one in case anyone is celebrating with their family this weekend.
Good Eats Roast Turkey - So moist and tender. The key seems to be brining the turkey. Our 13.5 lb turkey was in the brine for about 14 hours. Also key is the 30 minutes at 500 degrees to brown the turkey and seal in all the juices.
Alton Brown's Best Gravy Ever - Everyone seemed to like it even though I realized well after the fact (when we were starting the dishes actually) I forgot to add the salt, pepper and fresh rosemary.
Baked Mashed Potatoes with Parmesan Cheese and Bread Crumbs - These were good. The only change I have is that next time I will add more Parmesan cheese and some roasted garlic.
Orange Ginger Cranberry Sauce - I am not a huge cranberry sauce fan but I realize after eating this version, it was because I do not like the canned kind. The ginger gives it a nice bit of zing and I am a cranberry sauce convert.
Honey Wheat Dinner Rolls - I loved these rolls. They had just the right amount of sweetness. The only problem I had was I left them in about two-three minutes too long and the bottoms of the rolls got a bit burnt.
Dilled Carrots - Always a family favorite.
Creamed Corn with Pearl Onions (a favorite of Mr. Gooch's made by his mother) - based on everyone's reviews, this one was good as usual.
Mixed Berry Cheesecake - Holy cow! This may be the best cheesecake I ever tasted. It was light and the lemon zest gave it just the right amount of citrus flavor. With berries on the side, it was the perfect end to the meal.
Wednesday, November 26, 2008
A Taste of the Season - White Chocolate Cranberry Oatmeal Cookies
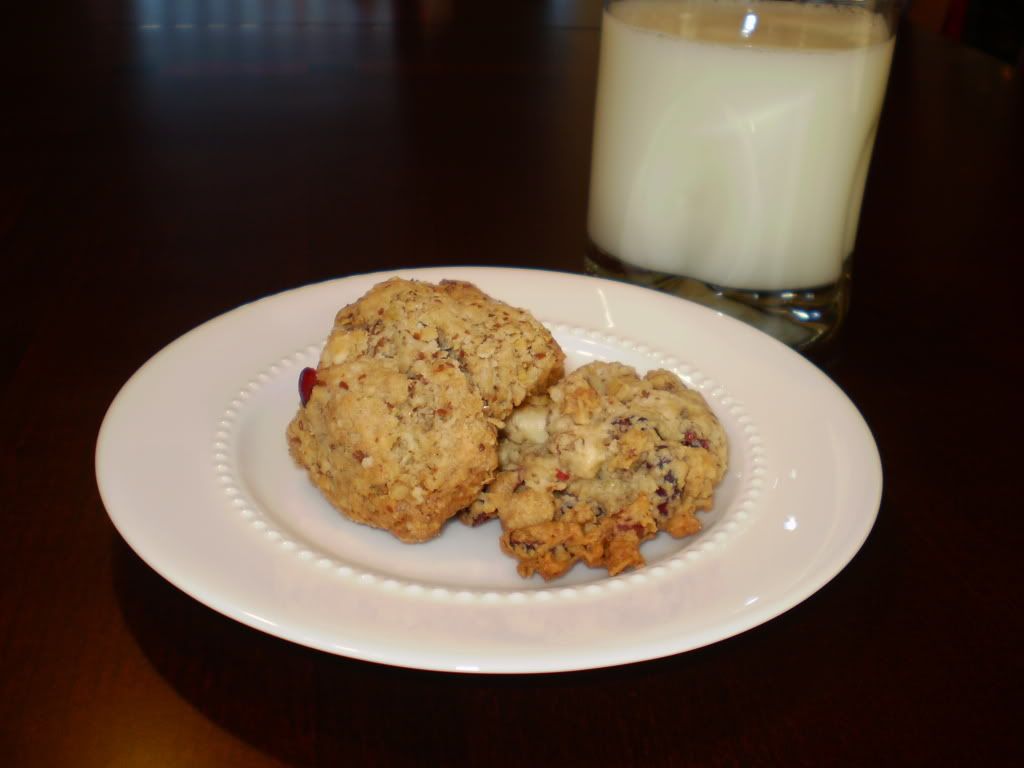 I am so glad that the pumpkin season is almost over. That means it is time for the cranberry to shine in baking and cooking. And to start off the cranberry season, I made some of the tastiest white chocolate cranberry oatmeal cookies ever.
Using a recipe found on Fresh from Cate's Kitchen (click here to view Cate's blog), these cookies barely lasted 56 hours in our house.
If you are looking for an easy and incredibly tasting cookie, this is the one for you.
White Chocolate Cranberry Oatmeal Cookies
Ingredients
1/3 cup sugar
1/3 cup packed brown sugar
1/2 cup butter, softened
1 large egg
1 teaspoon vanilla extract
1/2 teaspoon cinnamon (I used freshly grated nutmeg instead)
1/2 teaspoon baking soda
1/4 teaspoon salt
1 cup all-purpose flour
1 1/2 cups quick-cooking oats (not instant)
3/4 cup dried cranberries
6 ounces white chocolate chips
Directions
Preheat oven to 350 and line two baking sheets with silpats or parchment paper.
In a small bowl, whisk together flour, cinnamon, baking soda, and salt.
In the bowl of a stand mixer, cream the butter with the sugars until fluffy.
Add egg and vanilla and mix well.
Stir in oats, flour mixture, white chocolate, and cranberries and mix until combined.
Drop by heaping tablespoonfuls onto cookie sheets and bake for about 10 minutes, until just beginning to get a little color.
Panko, I Finally Get It - Zesty Italian Baked Chicken
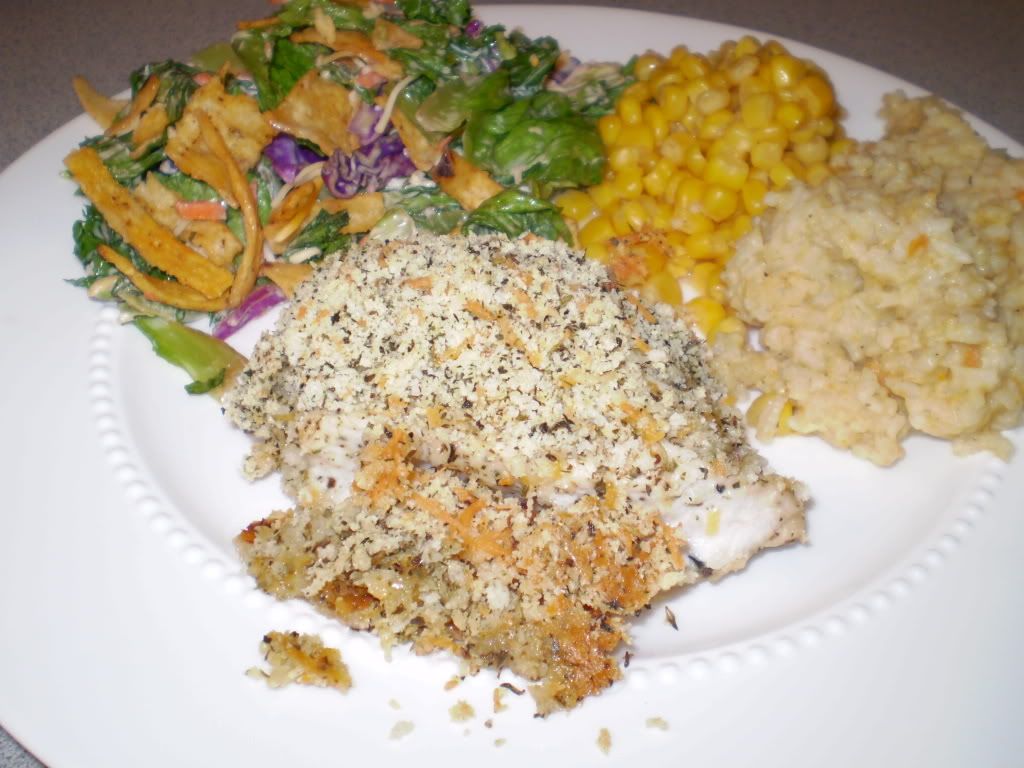 My goal is to try one new recipe each week and my Google Reader is full of possibilities. But many of them feature Panko as a key ingredient. Let me just start by saying I have always been a traditional breadcrumbs kind of girl so wasn't sure what all the hubbub was about. Well, now I get it and I am a convert. The crunchiness the Panko added to the recipe was amazing. I now want to Panko encrust everything before it goes in the oven.
I modified the original recipe since I thought it needed some crunch. To view the version I started with, click here. My version is below. Served with a salad, corn and rice made with chicken stock, this was a great meal.
Zesty Italian Baked Chicken
Ingredients
1/2 cup Zesty Italian reduced fat/low fat dressing
4 boneless skinless chicken breasts, cut into smaller pieces (I tried to make each piece about 6 oz./1 serving)
1/2 cup Parmesan grated cheese
1/2 cup Panko bread crumbs
2 teaspoons of Italian seasoning
1/2 cup finely shredded CoJack cheese
Directions
1. Pour the dressing into a resealable plastic bag. Add the chicken and seal the bag. Turn the bag over several times to evenly coat the chicken with the dressing. Refrigerate the chicken in the dressing for at least 1 hour.
2. Preheat the oven to 350°F.
3. Remove the chicken from the marinade and discard the marinade.
4. In a large bowl mix the Parmesan cheese, CoJack cheese, Italian seasoning and Panko. Dip the chicken into the mixture, turning to evenly coat both sides. Place in shallow baking pan sprayed with cooking spray. Spread left over mixture on top of chicken pieces.
5. Bake for 30 minutes or until the chicken is 170 degrees.
Tuesday, November 25, 2008
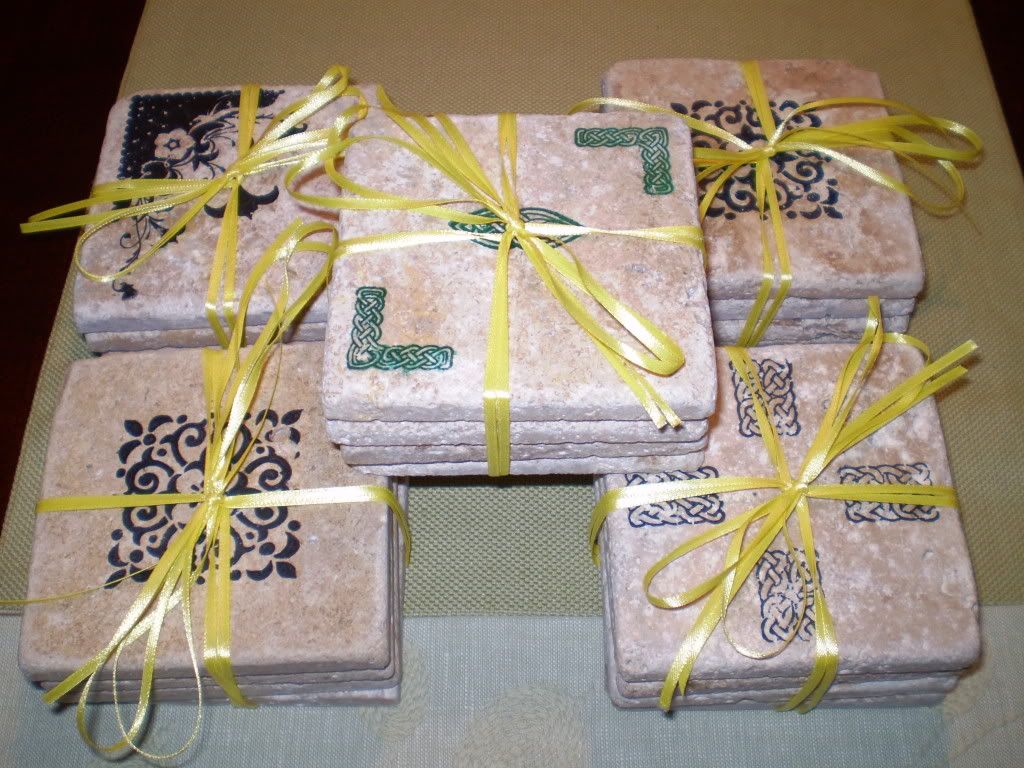
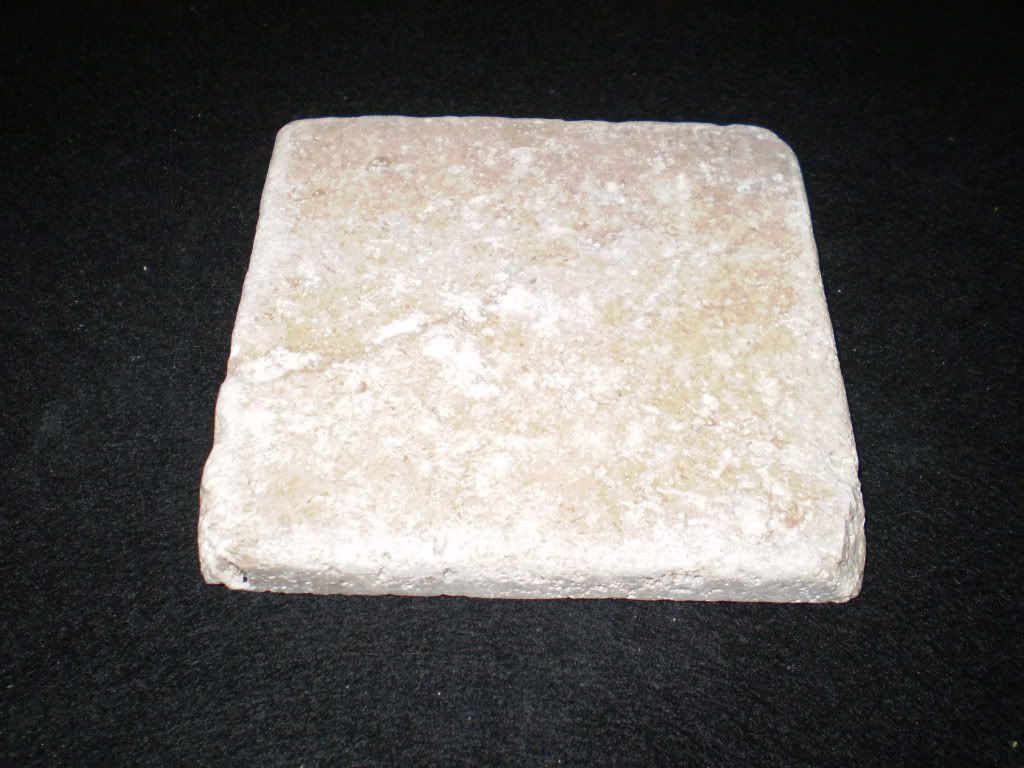
It's a DIY Christmas - Tile Coasters
**The first of several posts on the DIY projects Mr. Gooch and I will be completing over the next few weeks to put in our gift baskets running up to Christmas**
This year is a DIY Christmas. We are putting together gift baskets for everyone this year made up of DIY Projects (like these coasters) and soup/brownie/drink mixes packaged in a festive manner.
Tile Coasters
Supplies
4 x 4 tiles (I used a tumbled marble) [make sure to get several more than the total number you need since inevitably several will go horribly wrong]
StazOn Stamping Ink (this is a permanent stamping ink)
Self Adhesive Felt
Stamps
Sealer (I used a matte finish poly spray)
Directions
1. Rinse and dry tiles.
2. Place dry tile in center of your work area.
 3. Select your stamp color.
 4. Select your stamp.
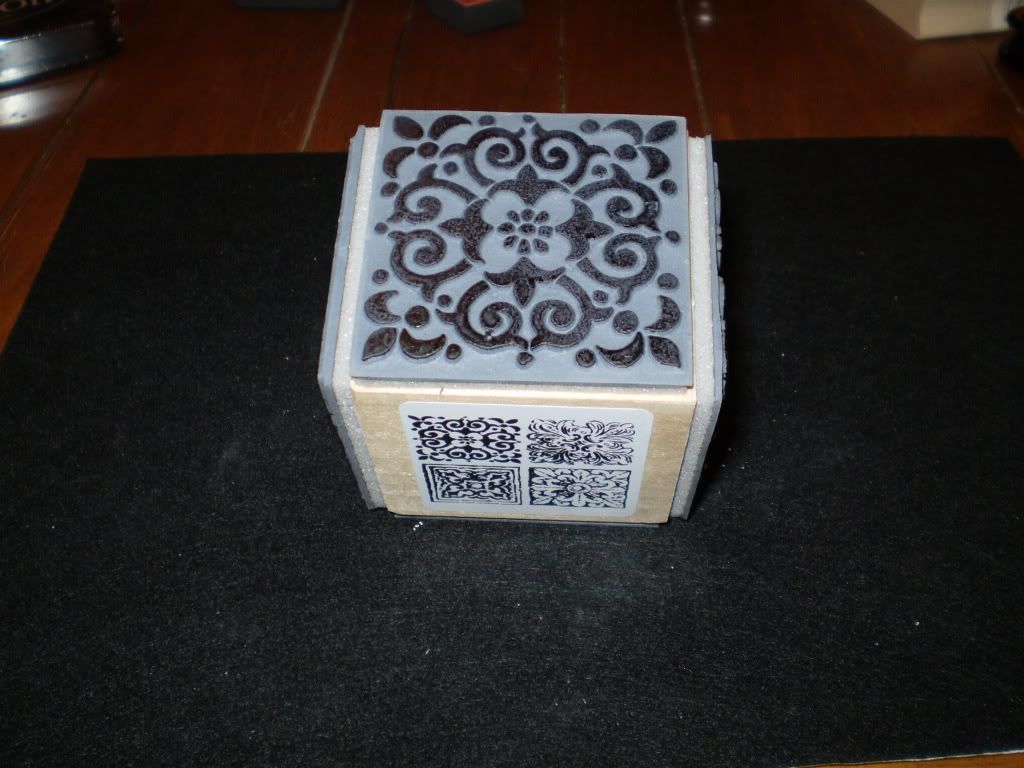
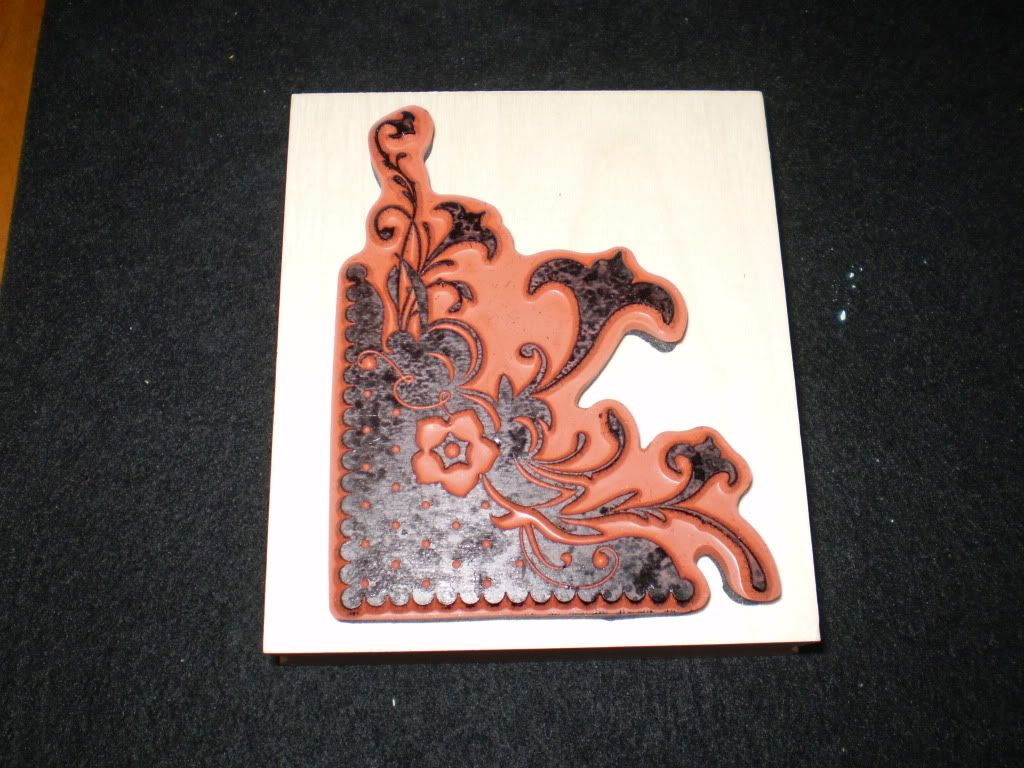
 5. Ink entire image, taking care to wipe off any excess that may have gotten on the edges of the stamp.
6. Line up stamp and press stamp with steady pressure onto tile.
 7. Fill in any spaces in the image on the tile with permanent marker of the same color.
 8. Let ink dry for 5 to 10 minutes, then place tile onto a cookie sheet and place in oven preheated to 375 degrees for 12-15 minutes.
9. Let cool completely.
10. Spray with sealer and let dry completely.
11. Place pieces of self adhesive felt to the bottom of the tile. I cut these in advance to speed this step. Each piece is about 1/4 inch square.
 12. Tie coasters together with ribbon for gift giving.
This year is a DIY Christmas. We are putting together gift baskets for everyone this year made up of DIY Projects (like these coasters) and soup/brownie/drink mixes packaged in a festive manner.
Tile Coasters
Supplies
4 x 4 tiles (I used a tumbled marble) [make sure to get several more than the total number you need since inevitably several will go horribly wrong]
StazOn Stamping Ink (this is a permanent stamping ink)
Self Adhesive Felt
Stamps
Sealer (I used a matte finish poly spray)
Directions
1. Rinse and dry tiles.
2. Place dry tile in center of your work area.
3. Select your stamp color. 4. Select your stamp.

 5. Ink entire image, taking care to wipe off any excess that may have gotten on the edges of the stamp.
6. Line up stamp and press stamp with steady pressure onto tile.
 7. Fill in any spaces in the image on the tile with permanent marker of the same color.
 8. Let ink dry for 5 to 10 minutes, then place tile onto a cookie sheet and place in oven preheated to 375 degrees for 12-15 minutes.
9. Let cool completely.
10. Spray with sealer and let dry completely.
11. Place pieces of self adhesive felt to the bottom of the tile. I cut these in advance to speed this step. Each piece is about 1/4 inch square.
 12. Tie coasters together with ribbon for gift giving.
Subscribe to:
Posts (Atom)